
Product Groups
Product Groups are a convenient way to create and view organized lists of material that is frequently purchased. Product Groups simplify the ordering process by eliminating the need for product search. Product Groups can be private or shared with others in your organization.
Follow the steps below to manage and create Product Groups.
1. Access Your Product Groups
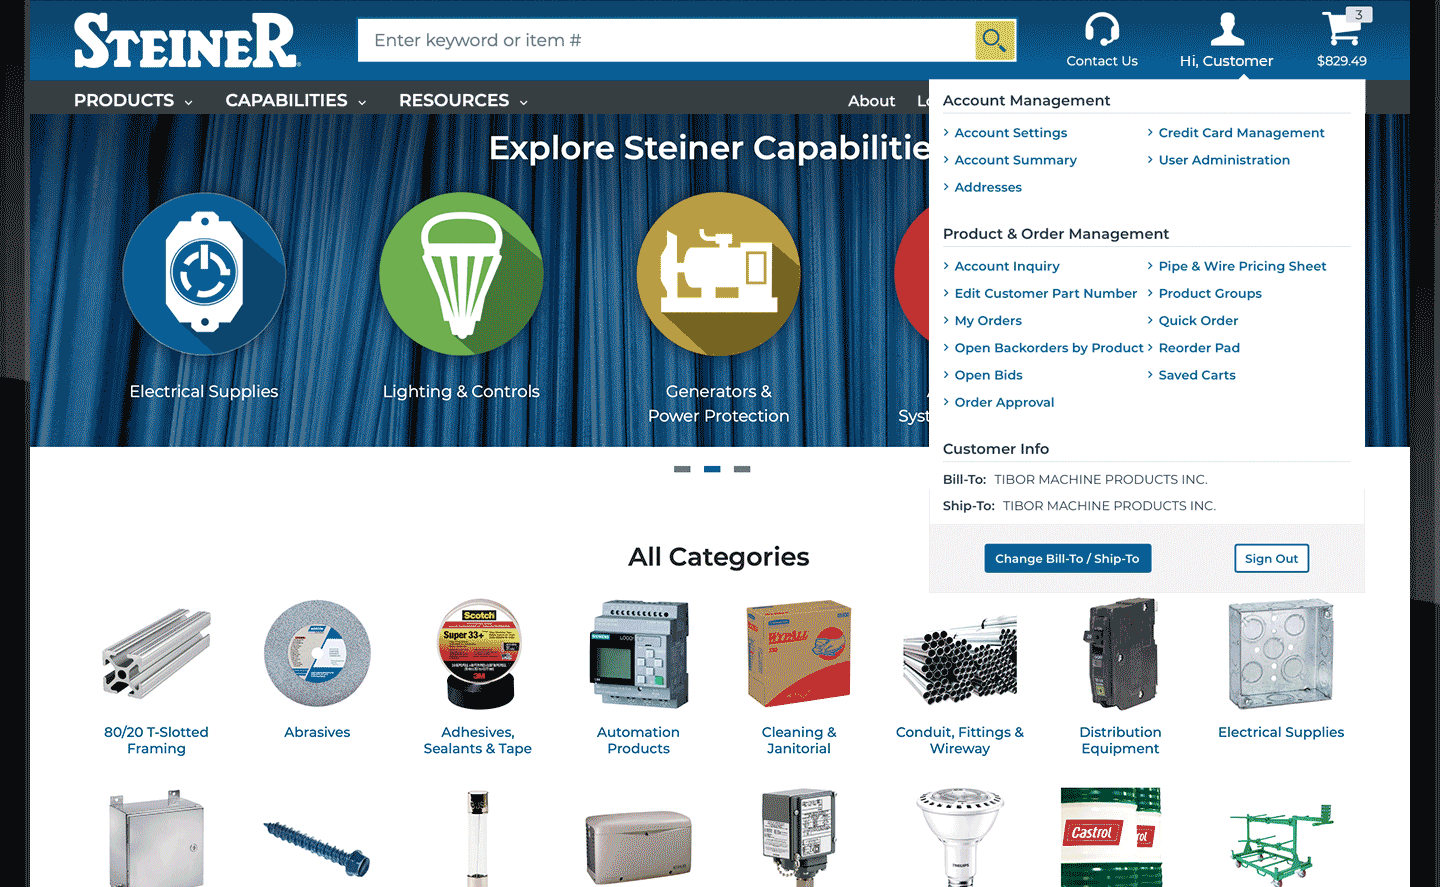
After logging into the website, the 'My Account' quick menu can be accessed by hovering over the ‘Person’ icon in the header. Click the ‘Product Groups’ link.
Alternatively, you can access Product Groups by clicking the ‘Product Groups’ link in the lefthand navigation of the ‘My Account’ page.
2. Create New Product Groups

Product Groups can be private or shared with others in your organization. Shared Product Groups can be managed with permission levels, so others may edit the group or be restricted to view only.
- On the 'My Product Groups' page begin by clicking the 'Create Product Group' button.
- In the popup that renders, enter the Product Group Name and Description then click the 'Create Product Group' button.
The new Product Group will appear in the list on the 'My Product Groups' page and items can now be added to it.
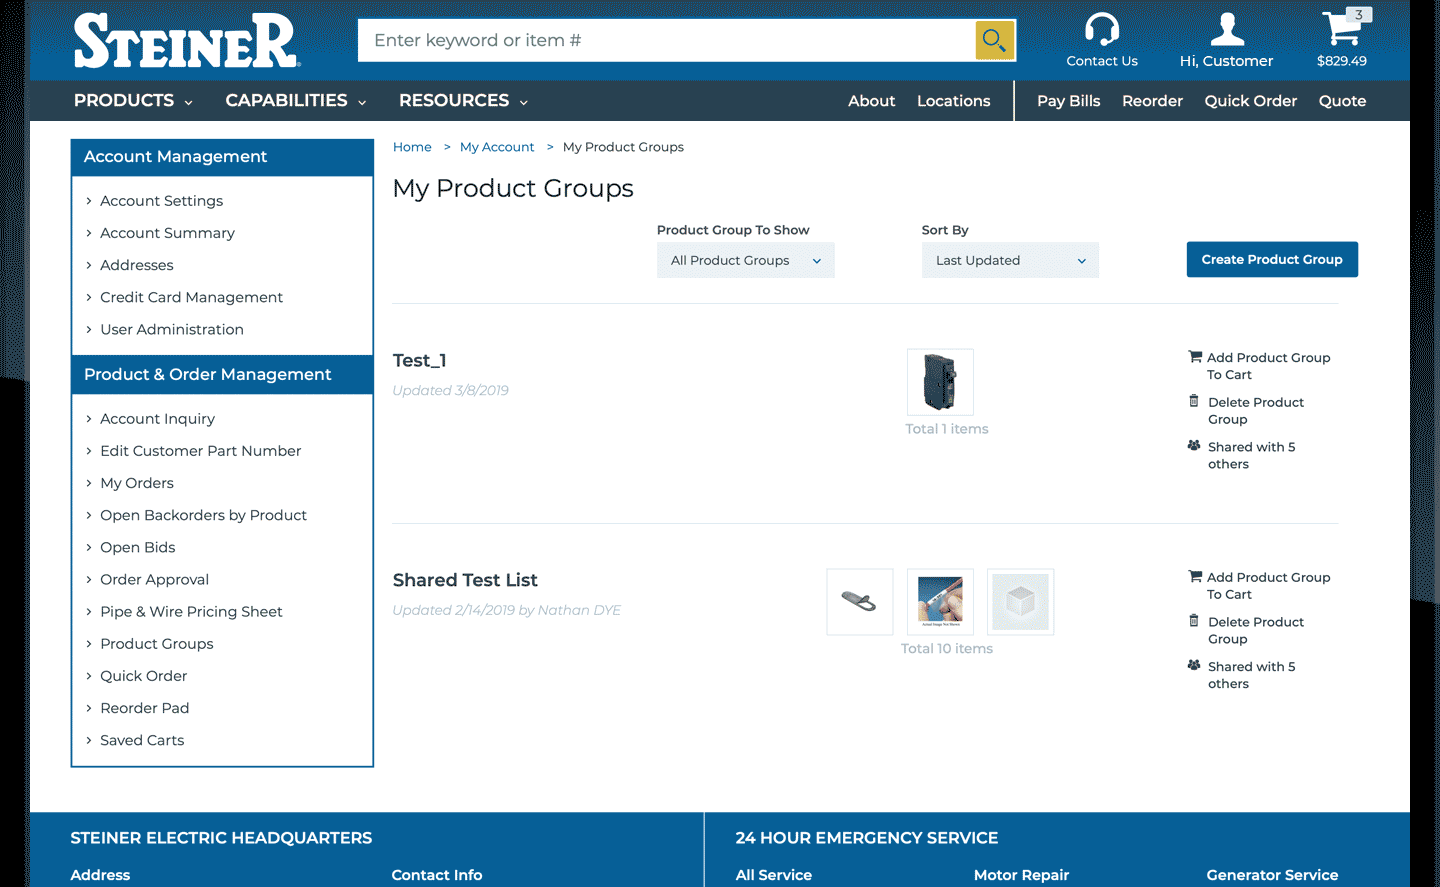
3. View Product Group Details
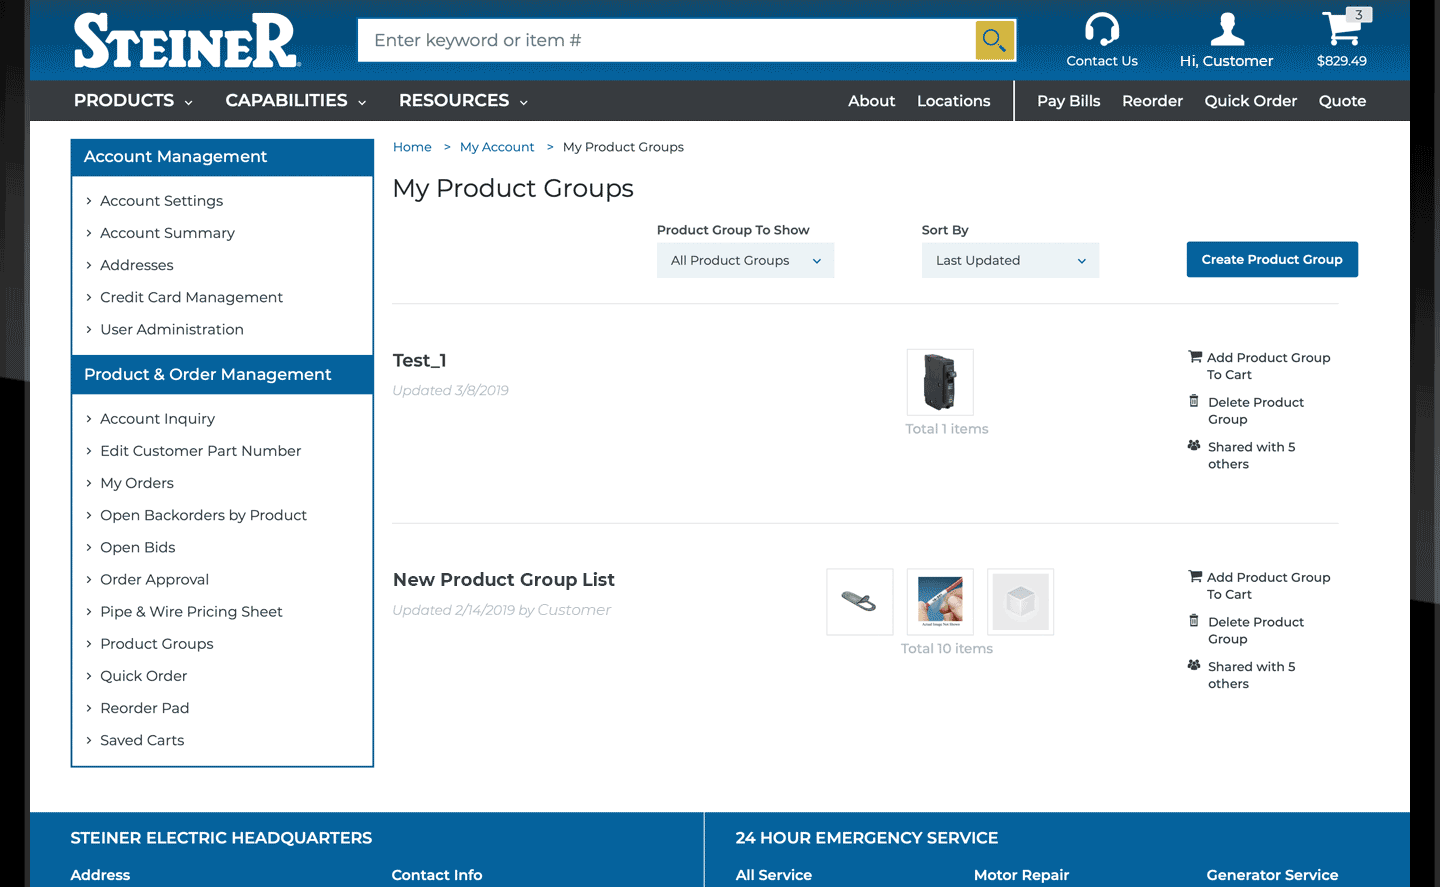
Locate the desired Product Group by selecting an option from the ‘Product Group to Show’ drop down or ‘Sort By’ drop down, and scroll through the groups on the page.
Click the Title of a Product Group to access the Product Group Details.
4. Add Items to Your Product Group
There are a variety of ways to add items to a Product Group.
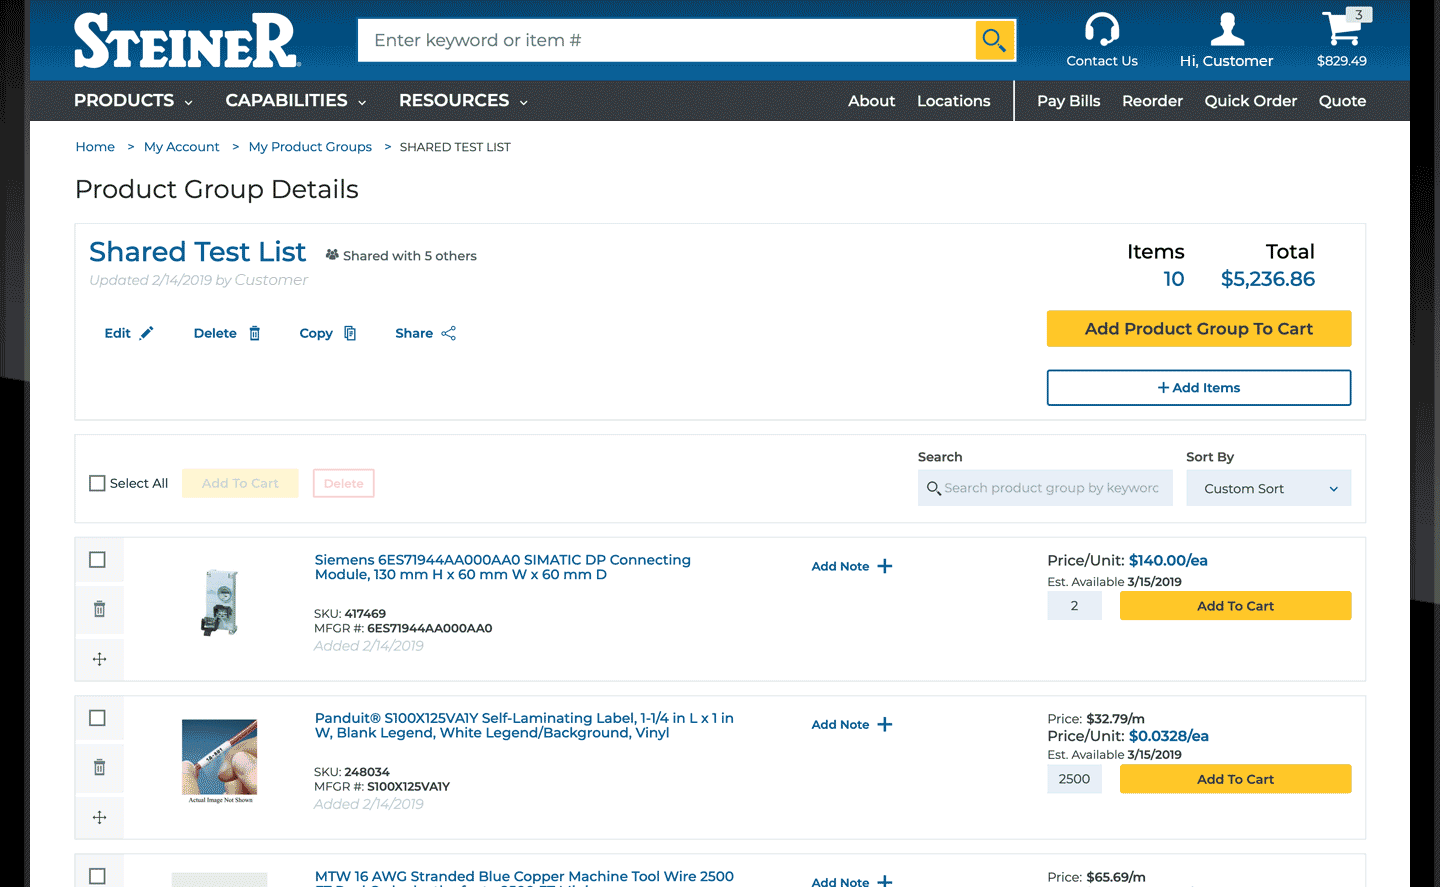
- From the 'Product Group Details' page, click the 'Add Items' button.
- In the popup window that renders enter a keyword or item # to search for a product, then fill in a quantity, and finally click the '+' button to add the item to your Product Group.
- You may also use the 'Upload Items' feature to quickly add multiple items to your Product Group.
After submitting items, a message will pop up indicating the items were successfully added to the Product Group.
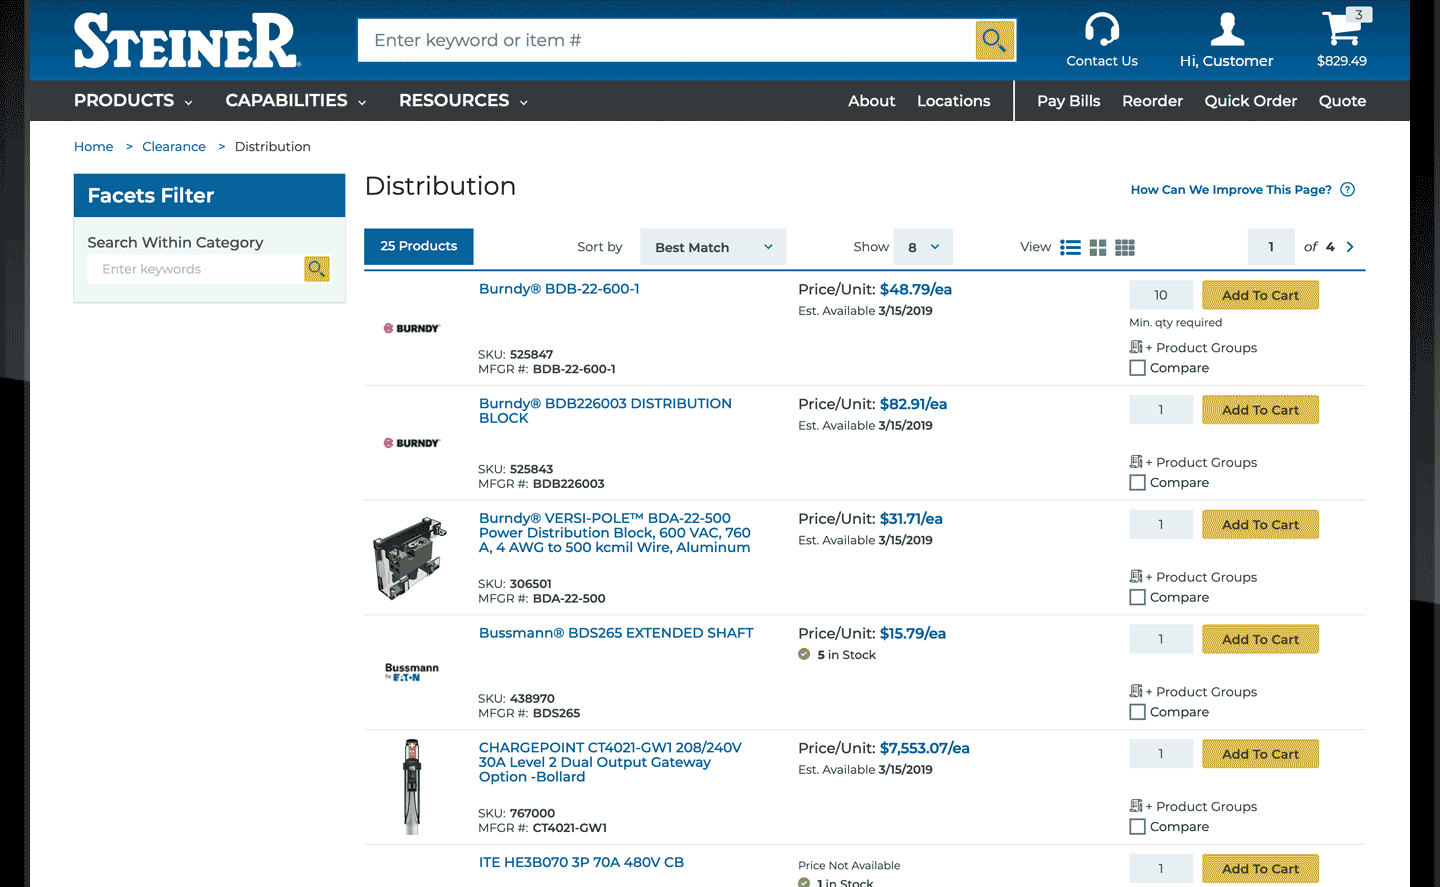
Items can be added to Product Groups throughout the website, including from Product Listing Pages, Product Detail Pages, Order Detail Pages, Reorder Pad, Open Bids, Account Inquiry and your Cart.
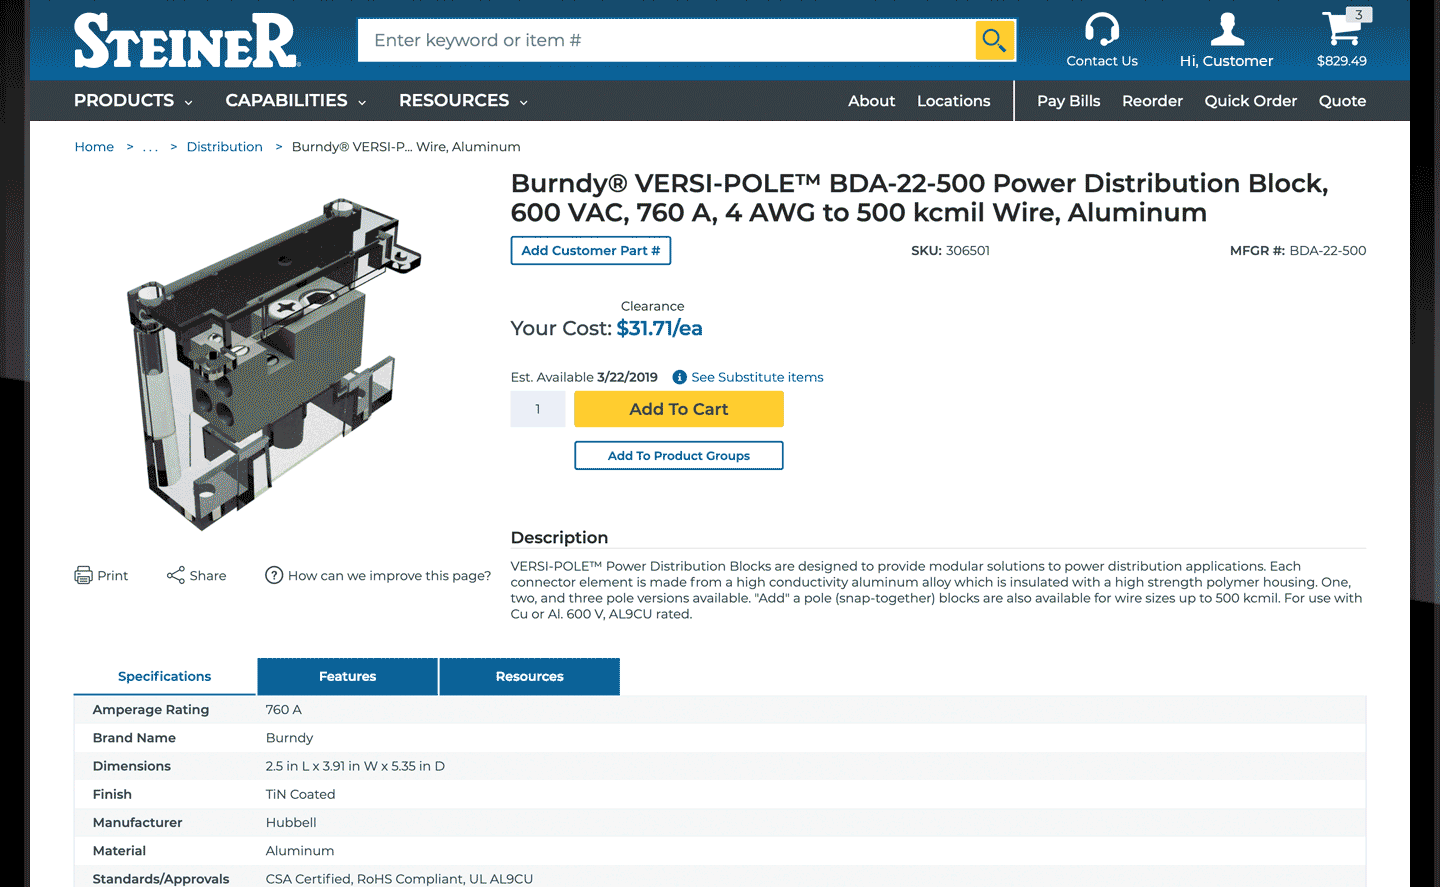
Look for the '+ Product Groups' link or 'Add To Product Groups' button on webpages throughout the site.
5. Edit, Delete, Copy or Share Product Groups
On the 'My Products Group' page, click the Title of a Product Group to edit, delete, copy or share it from its 'Product Group Details' page.
- Edit: Click the 'Edit' link to update the Product Group Name or Description. Click the 'Save' button when done.
- Delete: Click the 'Delete' link at the top of the 'Product Group Details' page to permanently remove the entire Product Group.
- Click the 'Trash Can' icon at the left of a line item to delete specific items.
- Copy: Click the 'Copy' link to copy one Product Group into another or to create a new Product Group with the same items.
- Share: Click the 'Share' link to share the Product Group with others in your organization.
- You may set permission levels, so others may edit or only view the Product Group.
- You may also email a link to someone to view the Product Group.
Additionaly on the 'My Products Group' page, you may add to cart, delete, share, or make a Product Group private.
- Click the 'Add Product Group To Cart' link to add all of its items to your Cart.
- Click the 'Trash Can' icon to permanently delete a Product Group.
- Click the 'Share' link to manage how the group is shared and with whom.
- In the 'Manage Sharing' popup window, click the 'Make Product Group Private' link if others should not see the Product Group.
6. Purchase Items From a Product Group

Items can be added to your cart from a 'Product Group Details' page.
- Update the Quantity (quantities can also be updated in the cart).
- Click the 'Select All' checkbox and then the adjacent 'Add To Cart' button to purchase all items from a Product Group.
- Click the 'Add to Cart' button at the line item level to purchase a specific item from a Product Group.
A popup message will appear indicating the items have been successfully added to your cart.
The 'Cart' icon in the header will be updated to indicate the number of items and subtotal in the cart.
Once items are added to the cart continue shopping or click the 'Cart' icon in the header to review items and checkout.
Return to Product Groups by clicking the 'My Product Groups' link at the top of the 'Product Group Details' page.
For more Web Tips to help you manage your Steiner account click here.